|
I toyed (ha-ha) with this idea
for a long time - even after I bought a playset with a great, easily customizable screen included. I love screens, room dividers,
whatever they're called, I think they add a unique element to any scene, from boudoir to dress shop to kitchen / living room.
Sure, the folded paper ones in doll magazines were nice, but...well, they were just paper. I wanted something I could make,
inexpensively and quickly - and the shape, design, and fabric choice could be customized simply, since form usually follows
function. It's rare that the divider between the living room and dining room would work at the Barbie Dress Shop as a changing
room, and also in her super-feminine bedroom. And once you make one, you'll want to make more, for many different uses !
I just couldn't figure out how
to make it stand alone. The nice Japanese and Chinese ones on eBay were massive enough to stand, and so were the super-thin,
but nearly always too small paper ones. But even the Mattel playset one had feet to stabilize it, and I didn't really want
that.
It simmered in the back of my
mind until I saw this - Mid-Craft Crisis' play farm fences !
( http://midcraftcrisis.blogspot.com/2010/05/fabric-play-farm-fences.html )
Basically, a well-sewn tube turned
right side out, supported by plastic needlepoint canvas within became an excellent fence for farm miniatures. What a great
idea ! Would it work for Barbie as a screen ?
I grabbed some fabric. Yes, but...
inexpensive quilter's cotton and cut-to-fit plastic canvas can only support so much. It bagged and didn't look firm at all.
So I worked with it a bit more - and here's the tutorial !
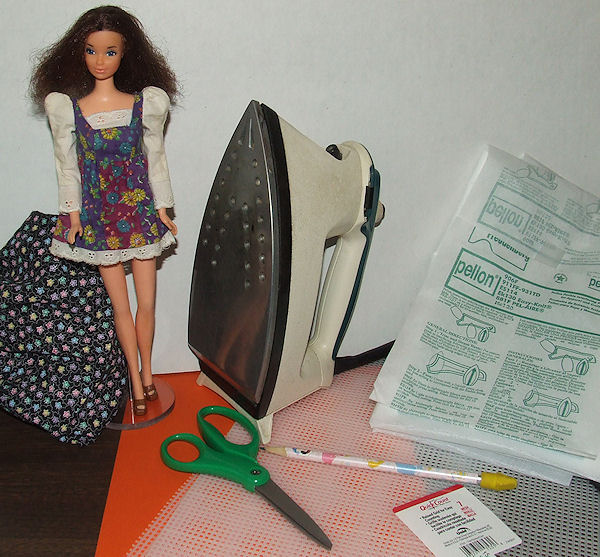
You'll need...
- A sheet of paper, to make your
pattern
- Scissors
- Pencil
- Fabric - can vary according
to your design, but I'd go with a half-yard - or use larger scraps for testing or a unique look. A third of a yard may work,
but that might be cutting it a bit close.
- Thread to match or contrast
your fabric.
- Plastic canvas - can also vary,
but you'll need at least one sheet, possibly two. Mesh size doesn't matter. Firmer the better.
- Stabilizer/Interfacing - I used
lightweight iron-on here, but you're welcome to use what you have, or what you prefer. Brand isn't important.
- An Iron and Ironing Board, if
you use the iron-on type interfacing.
- Sewing Machine and basic notions
- pins if needed, etc.
Nice to have, but not strictly
necessary :
- A doll, preferably with a stand,
for size and scale.
- A Sharpie, to mark the plastic
canvas for cutting.
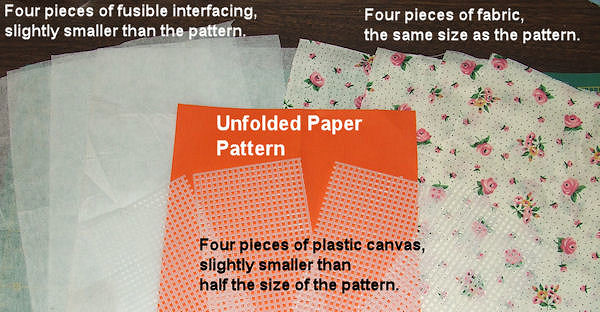
ed. note - the fabric shown above was replaced with a rose print.
Sorry for any confusion !
Let's go !
Here, I'm gonna show you the super-simple
'straight' version. Feel free to alter your version any way you like, using the same basic idea. We'll start with the pattern.
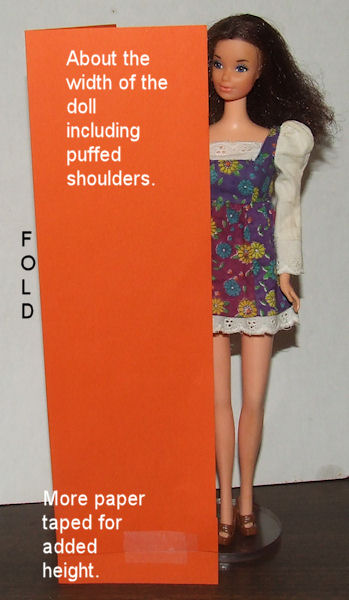
Have your doll ready for scale.
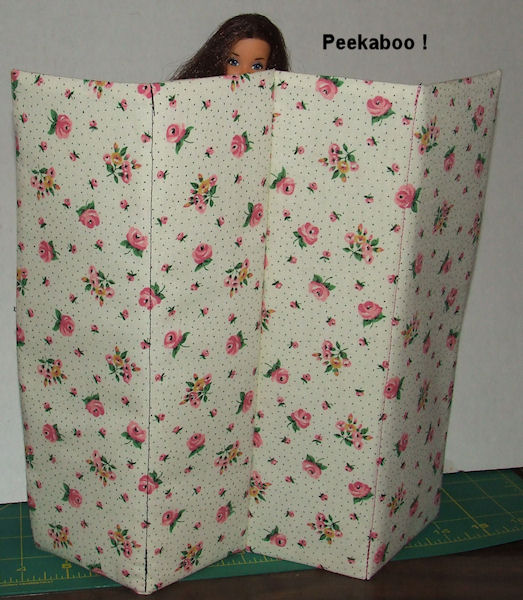
Since Barbie and co. are famously 11 1/2 inches tall, you may want a screen either taller or shorter than she is. Since I
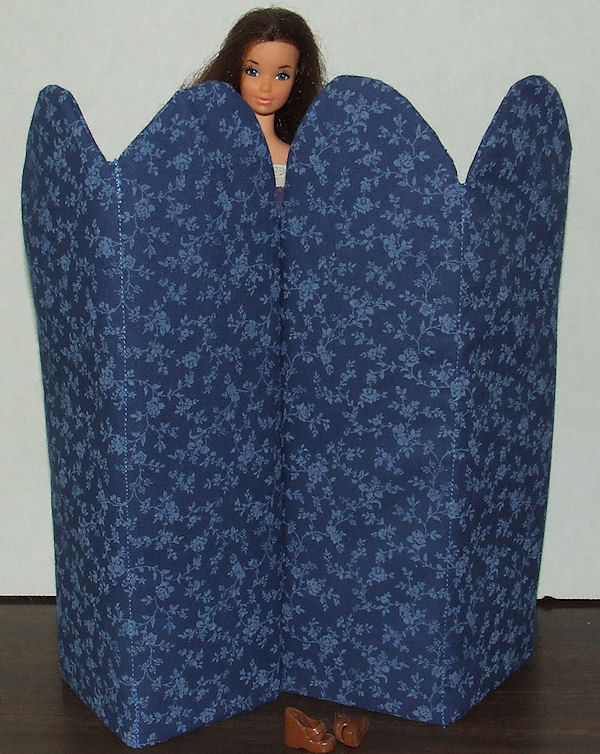
prefer the classic 'peekaboo' style, I wanted it a bit bigger, but not completely concealing.
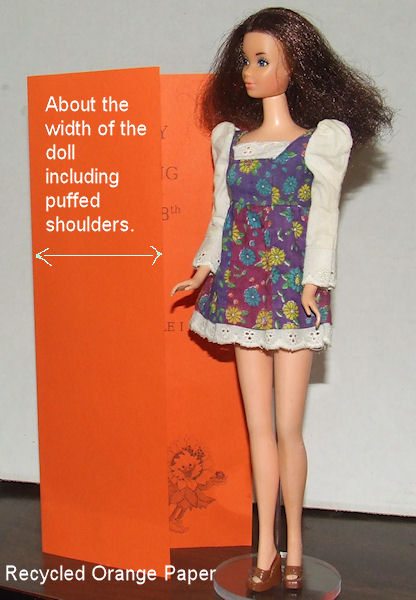
Grab a sheet of paper and fold
it to about as wide as your doll - maybe a bit wider, to allow for seams. Or whatever width you like. Cut the excess away.
If your paper isn't quite as tall as you'd like your screen to be, you can tape the excess to the bottom of your folded pattern.
When you're satisfied with your size and shape, grab your fabric and plastic canvas.
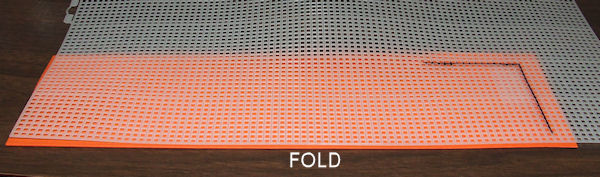
Since I'm going with a classic
four-panel screen, I'm gonna cut four pieces of identical plastic canvas. Each one will be half the size of your folded-paper
pattern. Plastic canvas is usually found in the yarn or cross-stitch sections of most craft stores and Mal-Wart's craft section.
It's pretty cheap, easy to cut, and can be used in many other applications- I've seen Barbie-sized drinking glasses and tote
bags - and even clothes ! - made from this stuff. So you may wanna save your scraps. Anyway...
I like to use a 1/4-inch seam
allowance, which is about three plastic canvas squares. So I'll cut my canvas nearly the same size as an individual panel
- but three squares narrower, and three squares shorter. I prefer a tight fit, but I can always trim it down if necessary
later.
ed. note - I had to trim it down
by three squares (too tall) and two lengths (too wide). Remember, the seam allowance goes *all the way around* ! (facepalm)
Still, it's better to have it too big and trim it than too small and have the screen bag and sag.
You can cut the fabric any way
you like. You'll need four pieces, so you can cut on the fold - good if you're working with smaller pieces - or stacked flat
for speed. Long as you have four full pieces, you're good.
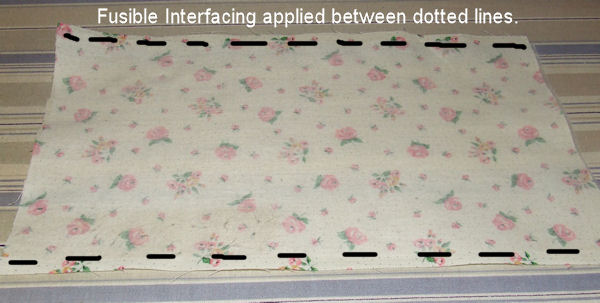
Yeah,
I know. Interfacing and ironing are a pain. But without it, your screen will probably look like my first attempt - saggy and
baggy and wrinkled. Sure, it looks OK in the picture, but it really looks bad in use. Interfacing really does make a difference.
Here's my first attempt - see the bags and sags and wrinkles ? Not good. That's why you really need the
interfacing here.

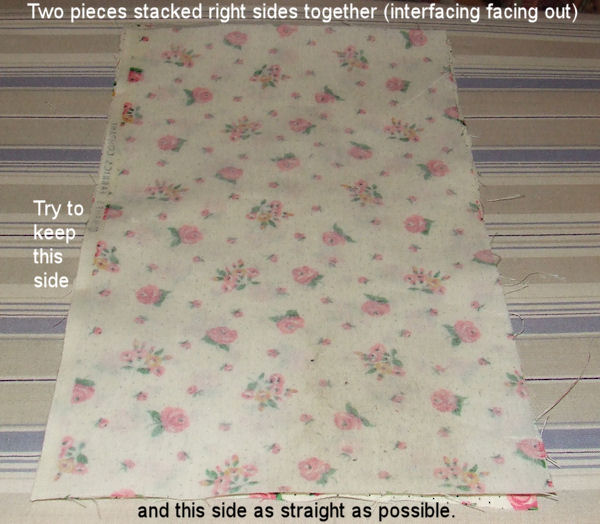
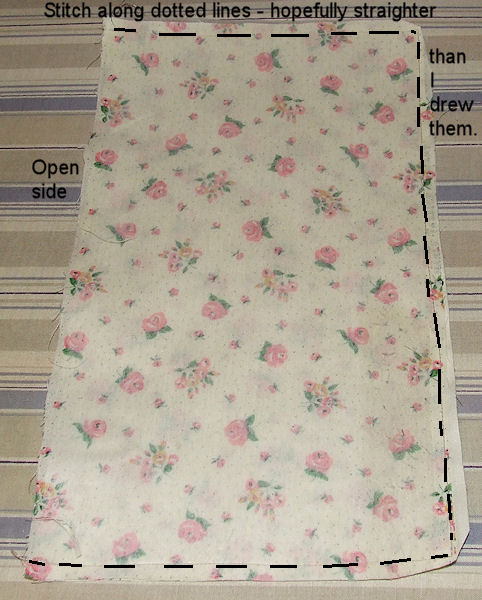
Now, it's time to sew ! Grab up
two of your interfaced pieces, and match 'em, right sides together. We're gonna sew the bottom edge, then the side, then the
top edge, and stop. One long side is left open, for turning and attaching to its' twin.
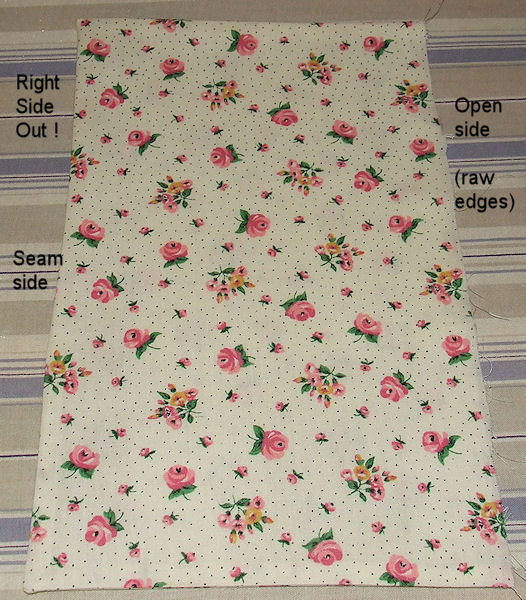
Clip your corners,
and turn it right-side out.
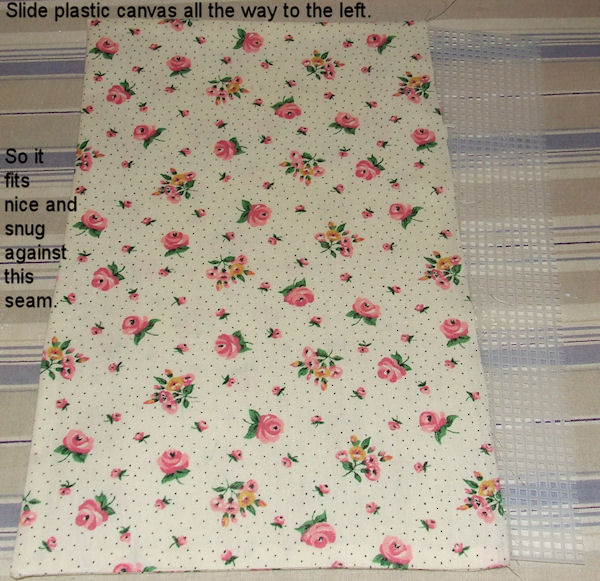
Time to add the plastic canvas
! It's a bit easier if your iron's still hot, and you press the bottom edge seam allowance to one side. Even if you don't,
it's still plastic canvas time. Take your first piece and slide it in, with the seam allowances all on one side or the other,
doesn't matter. Just try to keep it the same if you can. If the fit's a bit too tight, trim it down and slide it in again,
but you wanna keep it as tight and snug as you can. Once that first piece is in, we're gonna sew a seam straight down - well,
it's easier for me to show you than tell you.
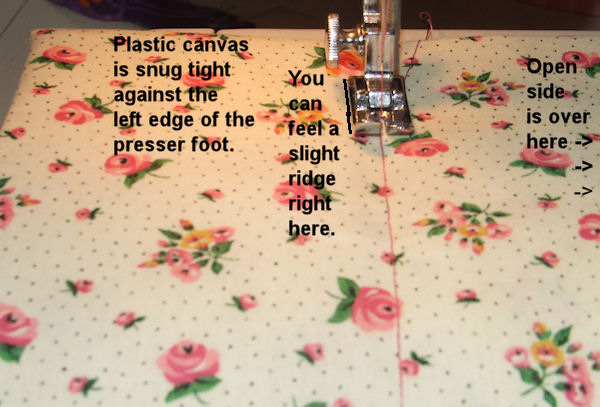
The seam keeps your plastic canvas
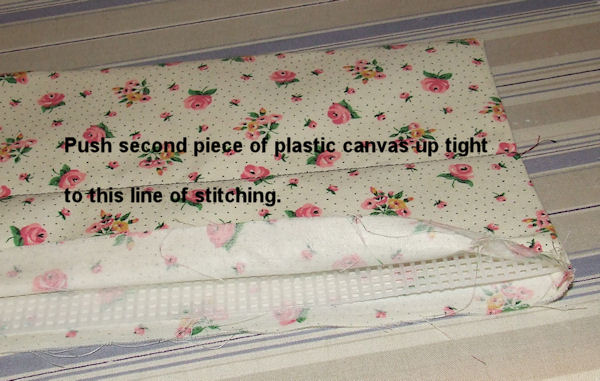
from shifting, and gives you a sort of hinge point. Insert the second piece of plastic canvas the same way, paying attention
to the seam allowances and fit. You can test your first piece - it should stand up on its own by itself.
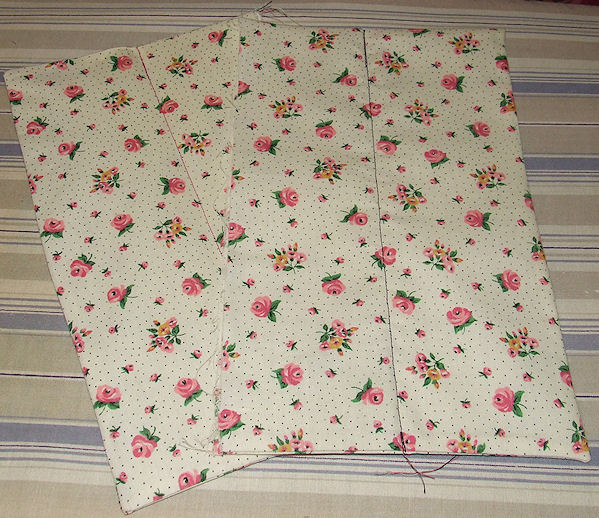
Now, the second half. Just like
the first half. Sew, turn, iron if you can, plastic, seam, plastic. Just make sure to match up those bottom edges, so it'll
stand up straight.
We are soooo close to being done.
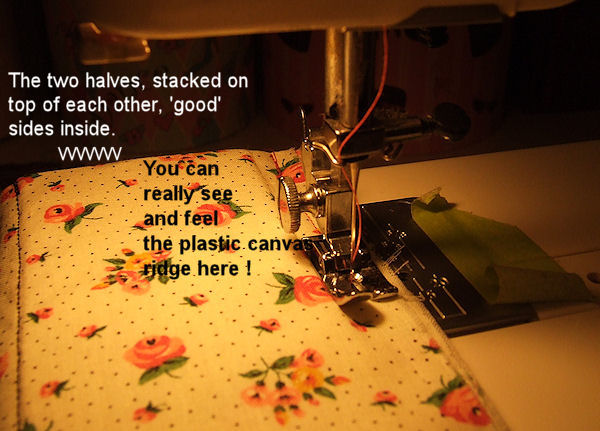
Seriously. One more seam, and it's screen ! Decide which of your sides you want facing out. With mine, do I want the pink
stitches facing out, or the black ones ? Or I can have one of each ! So that's what I did. Whichever ones you want to be the
'right' side, stack them together face-to-face. Sew them together at the open sides, which joins the two halves - and
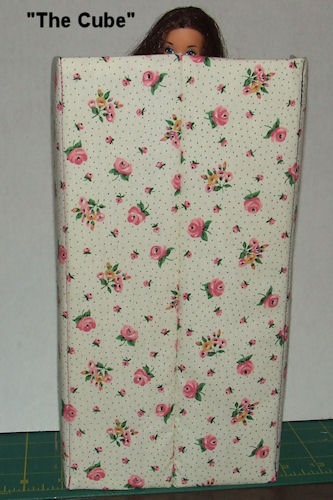
Barbie has a new screen ! Thanks to the long seams, you can fold it any way you like - zig-zag, cube, 'phone booth', nearly
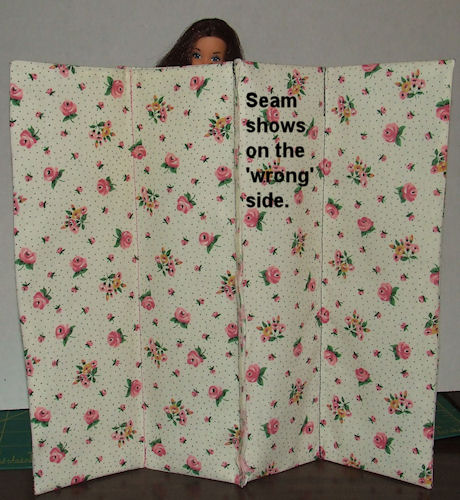
straight , whatever works ! Only one seam shows, and you can keep that facing where only Barbie will see it, or cover
the raw edges with a ribbon, or other decorations.
And that's the end. Seriously. Unless you wanna decorate it a bit more,
you have a Barbie-size screen, suitable for dressing rooms, makeshift phone booths, and the boudoir !
Here's what that exposed seam looks like. Ick. Keep that on the inside !
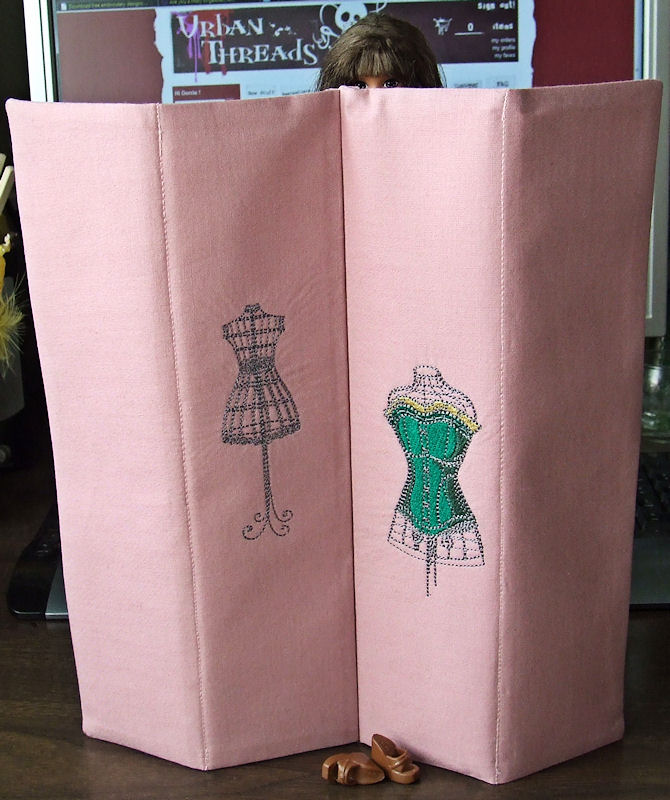
Now you know how it's done. Make
curved ones. Make walls ! Make a three-panel screen. Decorate with hand-sewn buttons or stickers. Embroider dress forms or
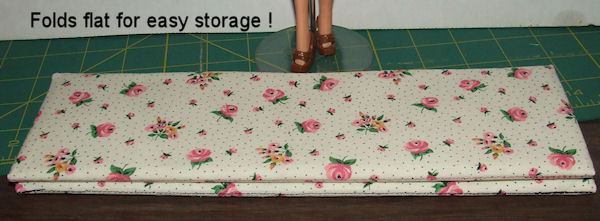
initials on the fabric before you cut for a truly upscale look. Make dozens, 'cause they fold down to nearly nothing. Wouldn't
some of your best work make for great table gifts at doll conventions - or for your best doll-hobby friends ? Shoot, you could
even give one to a co-worker, and call it a cubicle privacy screen, especially funny if they trick their workspace out with
action figures.
Hope this all made sense, enough for you to make lots of 'em - and have
better luck matching up those rounded-top ones than I've had so far ! Drop me a note on my blog - that's linked on the bottom
left over there - if you have a question or need help.
Thanks for joining us on another crazy craft !
Doll stand by MAD - click here, I love the three I bought - and wish
I had more !
|